Cross Border Pickups Help Center
How to Create an Import from a Package in CBP
Turn your package into an import and order in a few simple steps.
In this guide
Overview
Once our US team has processed your package at our US facility, you'll get a notification email. From there, you can log in to your Cross Border Pickups account and create the import and order for your package. An import is simply the record we use to bring your package across the border to you.
It only takes a few minutes, and this guide walks you through every screen.
Before you start
- You've received the email letting you know your package was processed.
- You have your invoice or receipt from the retailer handy. You'll upload it as proof of value in Step 4.
STEP 1
Select your package
First, find your package in your account.
- Log in to your Cross Border Pickups account.
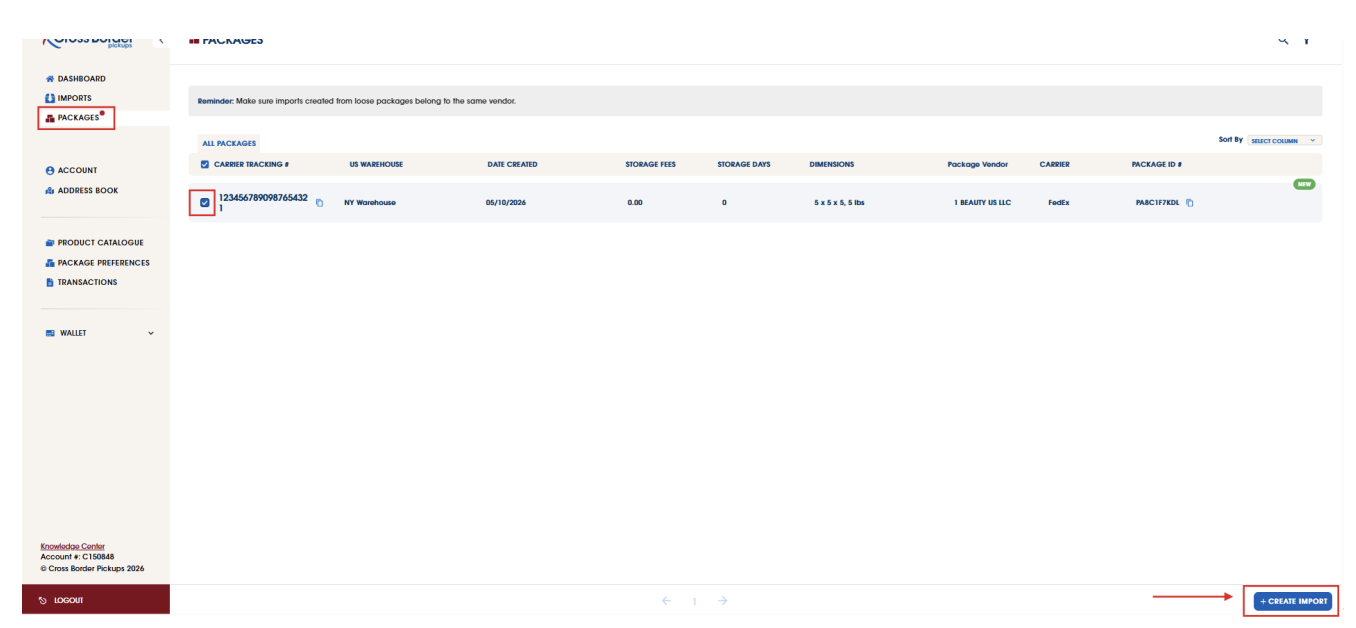
- Click Packages in the left-hand menu to see your pending packages.
- Tick the box next to the package you want to import.
- Click CREATE IMPORT in the bottom right corner.
You'll see: a new page where you can add the details for your package.
Tip: Have more than one package from the same order or vendor? Tick them all and create one import for the whole group.
STEP 2
Choose how you'd like to receive it
Now let us know whether you'd like your package delivered to you or picked up.
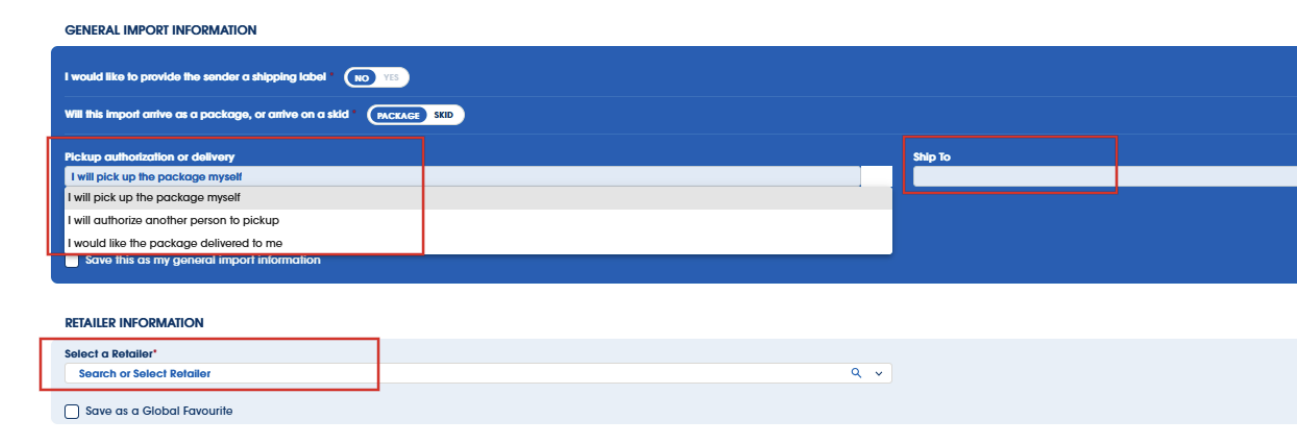
- Open the Pickup authorization or delivery dropdown and choose one:
- I will pick up the package myself: collect it from one of our retail locations in Ontario.
- I will authorize another person to pickup: someone you choose collects it for you.
- I would like the package delivered to me: we ship it to your address.
- If you chose delivery, select your address in the Ship To field.
You'll see: your choice shown in the General Import Information section.
Good to know: If your package was shipped to our WA address, your order must be a delivery order. We don't offer pickup for packages shipped to our WA address.
STEP 3
Tell us where you bought it
Next, tell us which store or vendor your package was ordered from.
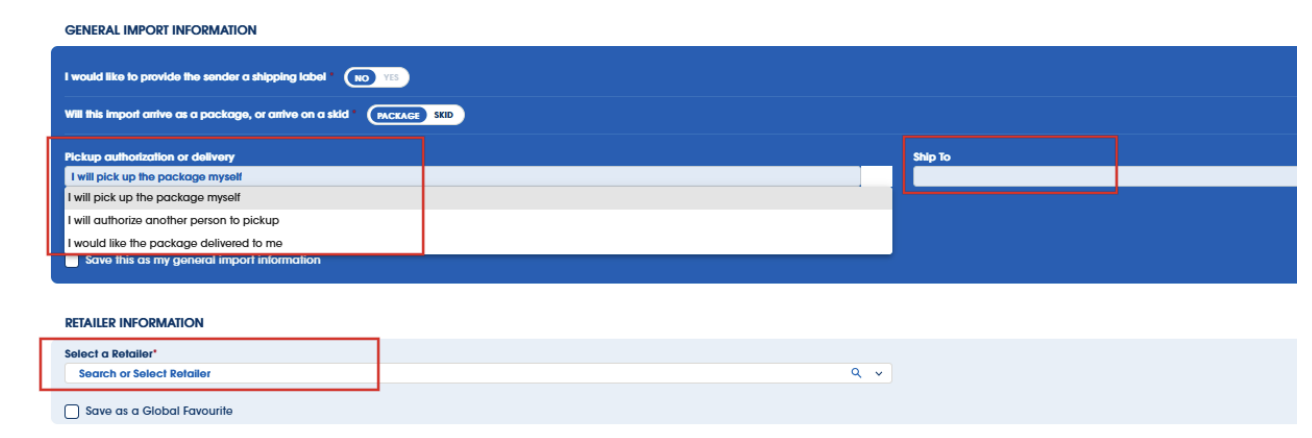
- In the Retailer Information section, click Select a Retailer.
- Search for the retailer, or pick it from the list.
- Optional: tick Save as a Global Favorite so it's quick to find next time.
You'll see: the retailer's name filled in.
STEP 4
Declare what's in your package
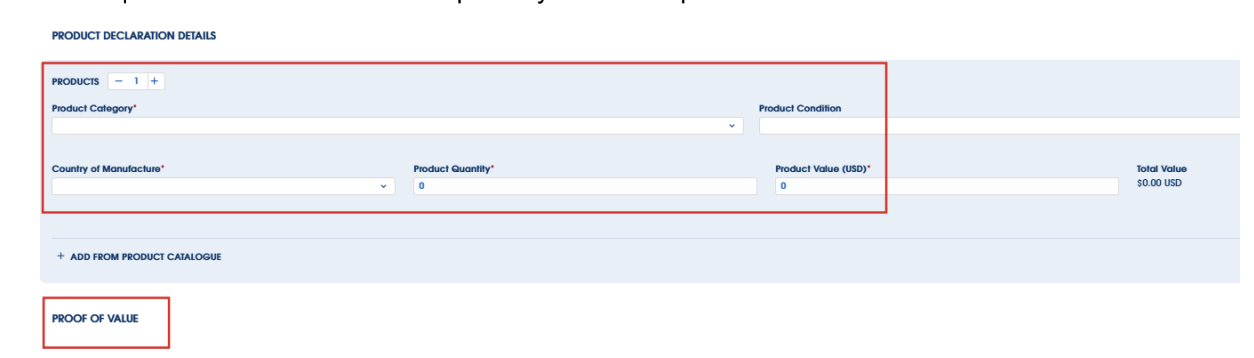
In the Product Declaration Details section, tell us what's inside. This helps your package clear the border smoothly.
- Choose the Product Category.
- Select the Country of Manufacture.
- Enter the Product Quantity.
- Enter the Product Value (USD). This is the price of the item before tax.
- Upload your Proof of Value, such as the invoice or receipt from your purchase.
You'll see: the Total Value update as you add your items.
Tip: Each unique item needs to be declared separately as its own product, with its own value before tax. Got three different items in the package? Add three products. Use the + button next to Products to add more.
STEP 5
Save, or review your pricing
You're almost there. At the bottom of the page, you have two options.
- Save & pay with other imports: We save your package information, and you can find the import under Imports in the left-hand menu. When you're ready, select all of your pending payment imports and check out together.
- Review Pricing: You'll go straight to the checkout steps below.
You'll see: either your saved import in the Imports tab, or the shipping and checkout pages.
STEP 6
Choose your delivery speed
If you picked delivery, you'll choose your preferred carrier option before paying.
- On the Select Shipping Services page, compare the options shown.
- Click SELECT under the one you'd like.
You'll see: the fees and estimated lead time for each option side by side, with your choice marked as selected.
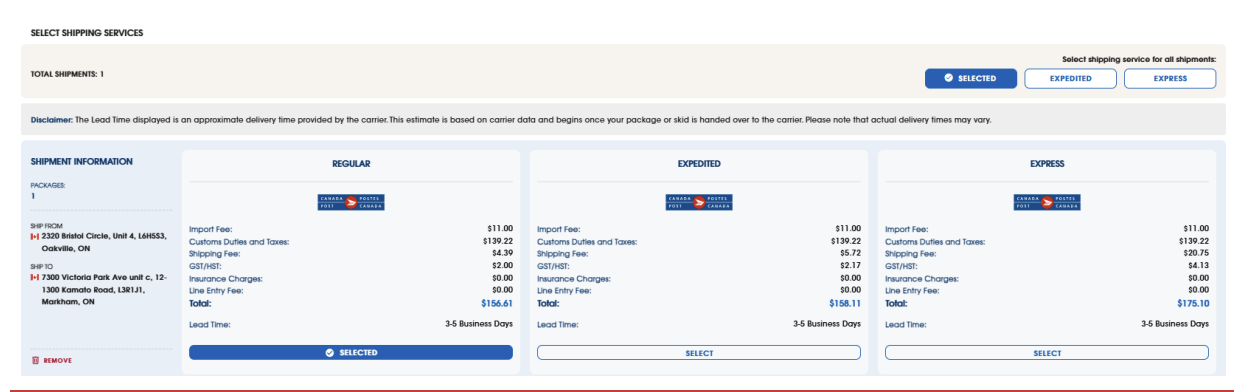
Good to know: The delivery time shown is an estimate provided by the carrier. It starts once your package is handed over to the carrier, so your actual delivery time may vary.
STEP 7
Check out
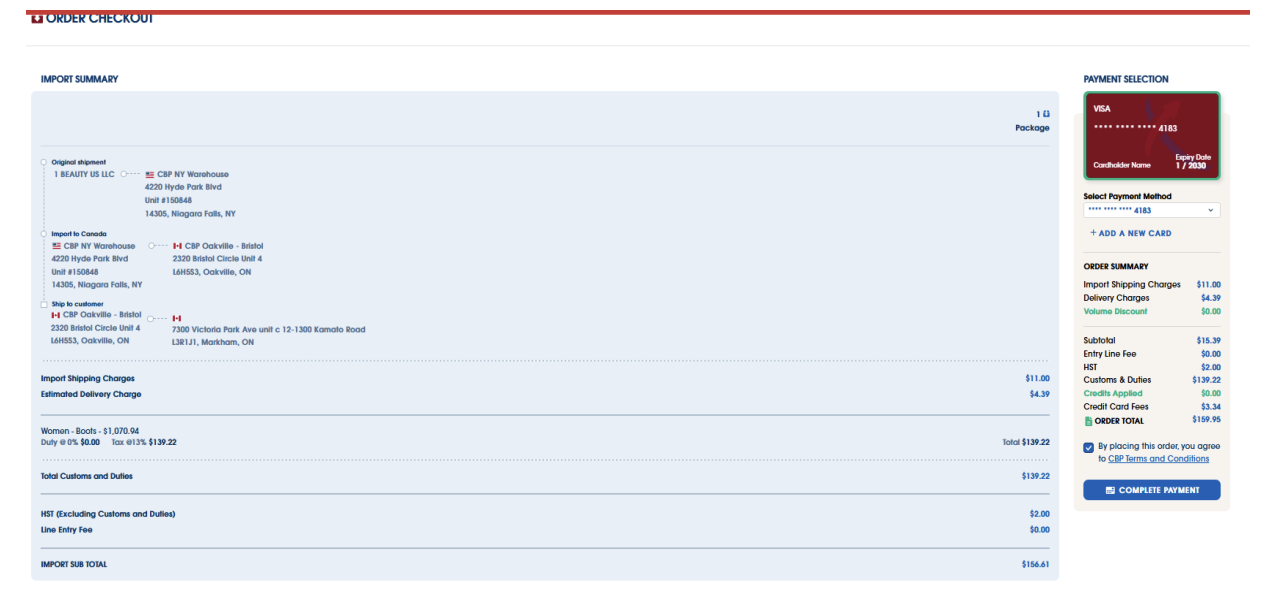
On the Order Checkout page, you'll see a full breakdown of your fees, so there are no surprises.
- Review your Import Summary, including your shipping details, customs and duties, and your order total.
- Under Payment Selection, choose your payment method, or click + Add a New Card.
- Tick the box to agree to the CBP Terms and Conditions.
- Click COMPLETE PAYMENT.
You'll see: your import is created, and we'll take it from here.
Troubleshooting and help
- Can't see your package? Packages show up in your account once our US team has processed them, and we'll email you when that happens.
- Packages from different vendors? Packages in one import need to be from the same order or vendor, so create a separate import for each vendor.
- Want pickup, but your package went to our WA address? Those packages are delivery only. Choose I would like the package delivered to me in Step 2.
- Not ready to pay yet? Choose Save & pay with other imports in Step 5, and come back to check out whenever you're ready.
Still stuck? Reach out to our support team and we'll help you out.
Was this article helpful?
That’s Great!
Thank you for your feedback
Sorry! We couldn't be helpful
Thank you for your feedback
Feedback sent
We appreciate your effort and will try to fix the article